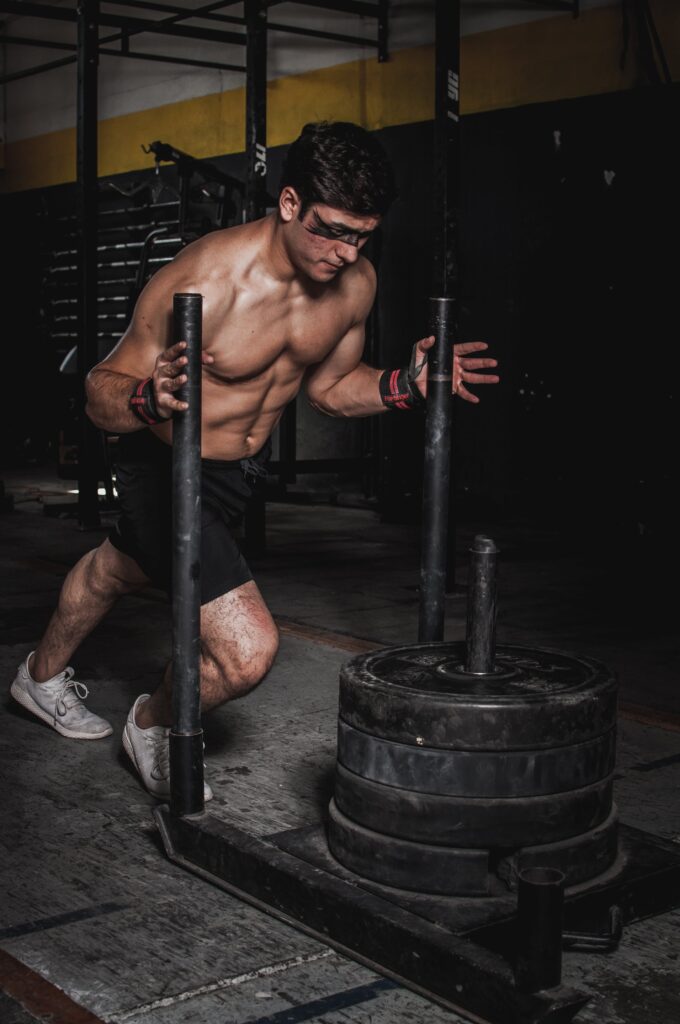
An extremely effective way to work out your upper body is with a push-day workout. An essential part of the renowned ‘push, pull, legs‘ workout split. This workout method stands out as a superior choice for targeting muscles in the upper body. This isn’t just some popular workout trend. This is about adopting a strategic approach that’s been proven to maximize strength and muscular development. A good push day is a cornerstone of a great modern fitness routine.
Thank you to coach Greg Luu for performing the exercises. Consider checking him out for program inquires!
What is a Push Day?
There are no tricks here; a push day is exactly what it sounds like. You will be focusing on exercises that involve a pushing motion. This may seem overly simple, but there’s a lot of muscle group synergy. So, rather than going through every muscle group one by one, you can get an extremely effective and time-efficient workout by focusing on muscle groups that are functionally related. Doing this gives your body more time to recover, meaning you can exercise the same muscle group twice a week rather than once, resulting in more gains!
Muscles Targeted on a Push Day
Chest
Pectoralis Major
This huge muscle is essentially your chest, but it’s made up of a few different components.
- Clavicular Head (Upper Chest): Located near the collarbone.
- Sternal Head (Lower): This is the larger, lower part of the pectoralis major.
- Pectoralis Minor
This smaller muscle lies beneath the pectoralis major. While it’s not as visible as the pectoralis major, it’s important for overall chest development and shoulder stability. This muscle stabilizes the scapula so many chest exercises will help work this muscle.
Tricep
- Long Head
The long head of the triceps is unique because it crosses two joints: the shoulder and the elbow. Aside from elbow extension, this muscle helps stabilize the shoulder joint. This is the largest muscle out of the three, but each part of the tricep is just as important to train. - Lateral Head
Essentially, the lateral head is the outside of the tricep. This muscle, which can be seen from the side or back, greatly contributes to the width and shape of the tricep. - Medial Head
The medial head is smaller and lies beneath the long and lateral heads. It’s more involved in finer movements of the arm. This muscle becomes more prominent the closer you are to full extension.
Shoulder
- Anterior Deltoid (Front Shoulder):
Located at the front of your shoulder, the main responsibility of this muscle is motions that require you to raise your arm in front of your body. - Lateral Deltoid (Middle Shoulder): Handles lifting the arm to the side. It’s crucial for healthy shoulder stability and range of motion.
- Posterior Deltoid (Rear Shoulder): Facilitates shoulder extension, moving the arm backward. This adds a lot of width to your shoulder, giving it a great shape
The Anatomy of a Push Day
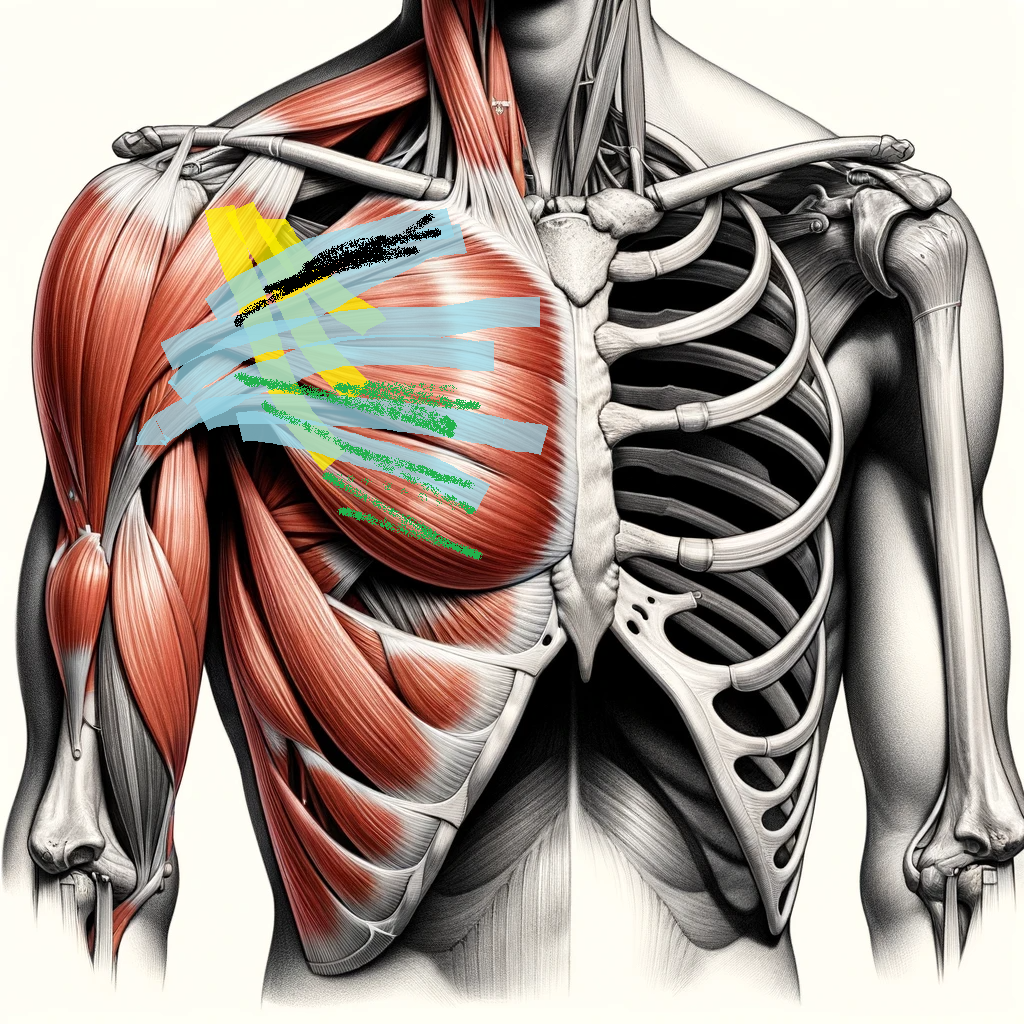
Pectoralis
The blue color highlights the pectoralis major overall. Yellow is the pectoralis minor; remember, this muscle is underneath the pec major. The black lines highlight the clavicular head, while the green highlights the sternal and costal
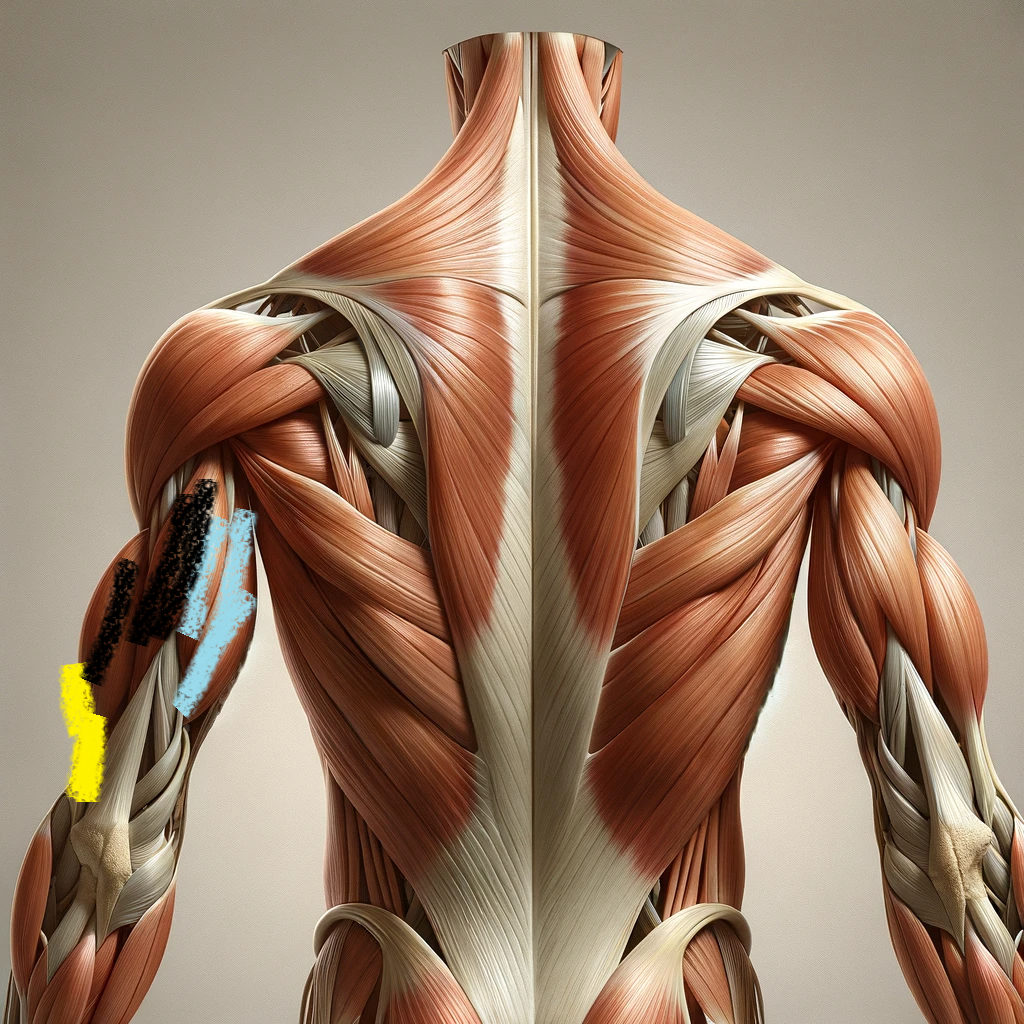
Tricep
The blue highlights the long head. Black indicates the lateral head, while yellow shows the medial head.
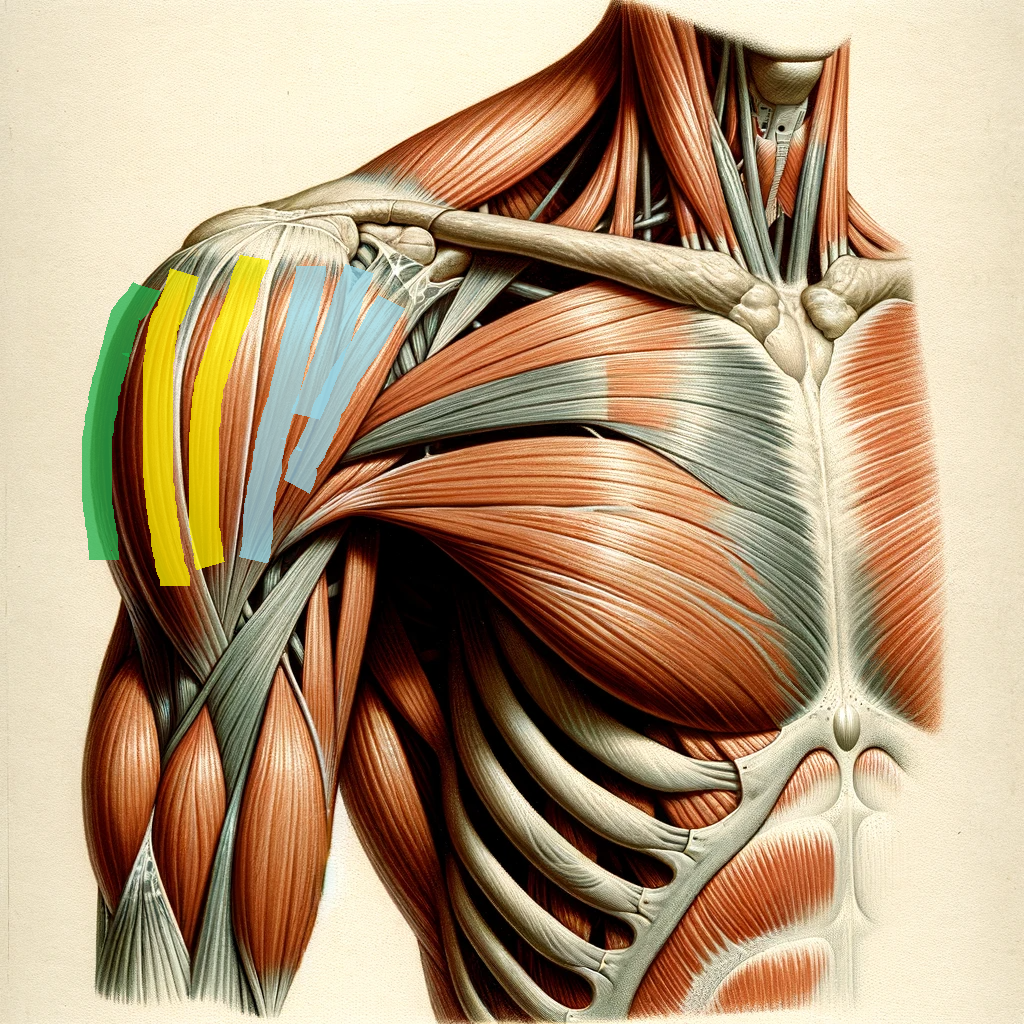
Shoulders
The blue color highlights the pectoralis major overall. Yellow is the pectoralis minor; remember, this muscle is underneath the pec major. The black lines highlight the clavicular head, while the green highlights the sternal and costal
Push Day Workout
Dumbbell Bench Press
The dumbbell bench press is considered one of the greatest exercises to work out your pecrotalis major overall. It will also partially target your triceps and anterior delts. (front of shoulders)
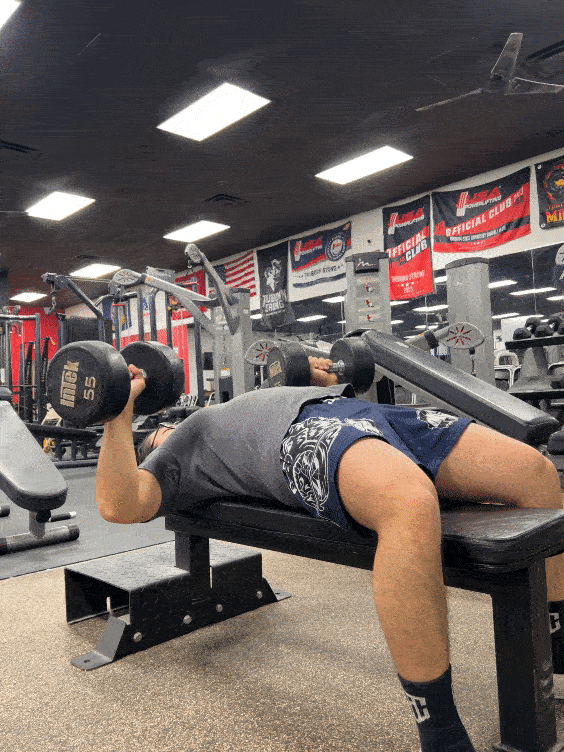
- Starting Position: Sitting on the bench with a dumbbell in each hand resting on your thighs helps in preparing for a safe transition to the lying position.
- Transition to Lying Position: Rolling onto your back while bringing the weights to your chest is a safer method to get into the starting position. It reduces the risk of shoulder injury which can occur if you lift the dumbbells from a standing position directly to the press position.
- Hand and Feet Positioning: Having your palms facing away and feet planted firmly provides stability and proper alignment. This positioning ensures that the primary focus is on the pectoral muscles.
- Shoulder and Back Positioning: Rolling your shoulders and back into the bench helps in maintaining a neutral spine, which is crucial for preventing back injuries.
- Lowering the Dumbbells: Inhaling while lowering the weights in a controlled motion helps maintain control and stability. Keeping elbows flared at about 45-60 degrees minimizes excessive shoulder activation and places more emphasis on the chest muscles. Keeping wrists neutral avoids unnecessary strain on the wrists.
- Depth of Movement: Bringing the dumbbells down to chest level (but not further) ensures full engagement of the chest muscles without putting undue strain on the shoulder joints.
- Pressing the Dumbbells Up: Exhaling while pushing the weight up is a standard breathing technique that supports exertion. Driving with the feet and tightening the core increases overall stability and power during the press. Pushing your back into the bench provides a stable base to push from.
- Elbow Position at the Top: DO NOT hyperextend or lock out the elbows at the top of the movement is crucial to maintain tension in the muscles and to prevent joint strain.
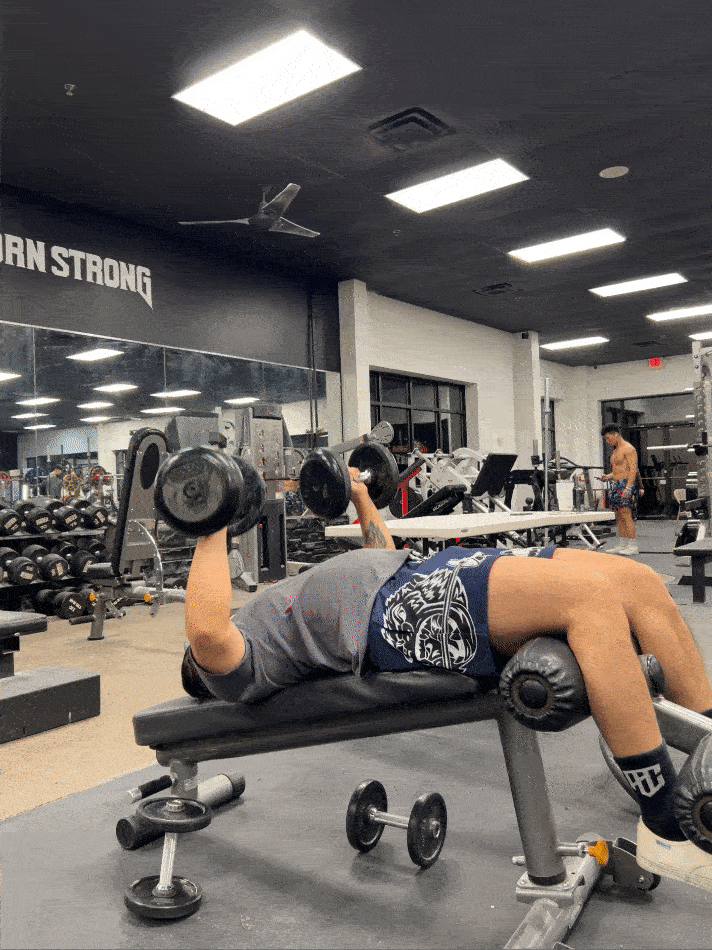
Incline Dumbbell Bench Press
The incline in the angle of the bench in this exercise shifts the focus more towards the upper chest and shoulders. The exact muscles targeted can vary slightly depending on the angle of the incline The incline dumbbell press primarily targets the upper portion of the pectoralis major. (clavicular head). This exercise also targets the front of your shoulders, triceps, and serratus anterior.
- Starting Position: Adjust the bench to 30-45 inclined degrees. Sitting on the bench with a dumbbell in each hand resting on your thighs helps in preparing for a safe transition to the lying position.
- Transition to Lying Position: Rolling onto your back while bringing the weights to your chest is a safer method to get into the starting position. It reduces the risk of shoulder injury which can occur if you lift the dumbbells from a standing position directly to the press position.
- Hand and Feet Positioning: Having your palms facing away and feet planted firmly provides stability and proper alignment. This positioning ensures that the primary focus is on the pectoral muscles.
- Shoulder and Back Positioning: Rolling your shoulders and back into the bench helps in maintaining a neutral spine, which is crucial for preventing back injuries.
- Lowering the Dumbbells: Inhaling while lowering the weights in a controlled motion helps maintain control and stability. Keeping elbows flared at about 45-60 degrees minimizes excessive shoulder activation and places more emphasis on the chest muscles. Keeping wrists neutral avoids unnecessary strain on the wrists.
- Depth of Movement: Bringing the dumbbells down to chest level (but not further) ensures full engagement of the chest muscles without putting undue strain on the shoulder joints.
- Pressing the Dumbbells Up: Exhaling while pushing the weight up is a standard breathing technique that supports exertion. Driving with the feet and tightening the core increases overall stability and power during the press. Pushing your back into the bench provides a stable base to push from.
- Elbow Position at the Top: DO NOT hyperextend or lock out the elbows at the top of the movement is crucial to maintain tension in the muscles and to prevent joint strain.
Decline Dumbbell Bench Press
The decline in the angle of the bench in this exercise shifts the focus towards the lower chest. The decline dumbbell press primarily targets the lower portion of the pectoralis major. (sternal head). This exercise still targets the shoulder but reduces the load greatly on your shoulders. However, I highly recommend this exercise if you have underdeveloped lower pectorals. The flat dumbbell bench can still effectively target this muscle!
- Starting Position: Adjust the bench to 15-30 degrees declined degrees. Sitting on the bench with a dumbbell in each hand resting on your thighs helps in preparing for a safe transition to the lying position.
- Transition to Lying Position: Rolling onto your back while bringing the weights to your chest is a safer method to get into the starting position. It reduces the risk of shoulder injury which can occur if you lift the dumbbells from a standing position directly to the press position.
- Hand and Feet Positioning: Have your palms facing away and feet hooked to the bench.
- Shoulder and Back Positioning: Rolling your shoulders and back into the bench helps in maintaining a neutral spine, which is crucial for preventing back injuries.
- Lowering the Dumbbells: Inhaling while lowering the weights in a controlled motion helps maintain control and stability. Keeping elbows flared at about 45-60 degrees minimizes excessive shoulder activation and places more emphasis on the chest muscles. Keeping wrists neutral avoids unnecessary strain on the wrists.
- Depth of Movement: Bringing the dumbbells down to chest level (but not further) ensures full engagement of the chest muscles without putting undue strain on the shoulder joints.
- Pressing the Dumbbells Up: Exhaling while pushing the weight up is a standard breathing technique that supports exertion. Driving with the feet and tightening the core increases overall stability and power during the press. Pushing your back into the bench provides a stable base to push from.
- Elbow Position at the Top: DO NOT hyperextend or lock out the elbows at the top of the movement is crucial to maintain tension in the muscles and to prevent joint strain.
Dumbbell Front Raise
The dumbbell front raise targets the front of the shoulders. (Anterior delts) This exercise also engages your upper chest and muscles along the ribs. The form is easy to master making it a fantastic exercise for advanced and beginner lifters.
- Starting Position: Begin with a neutral grip, holding the dumbbells at your sides with your arms fully extended.
- Raising the Dumbbells: As you exhale, engage your core and lift the dumbbells outward and forward, keeping your arms straight. Elevate the weights smoothly until they reach shoulder height, ensuring they do not cross in front of your chest.
- Lowering the Dumbbells: Inhale as you gradually lower the dumbbells back to the starting position, controlling the movement throughout.
- Depth of Movement: To maintain proper form, raise your arms slightly above shoulder level at most, then return to the starting position in a controlled manner, avoiding any swinging motion.
- Elbow Position at the Top: Keep your arms predominantly straight with a slight bend in the elbows. This slight bend helps prevent hyperextension or locking of the elbows, ensuring a safe and effective exercise.
Dumbbell Lateral Raise
The dumbbell lateral raise targets the middle of the shoulders. (Lateral delts) This exercise also engages your traps. Be aware of your elbow position throughout this exercise remember to keep a slight bend in your elbows.
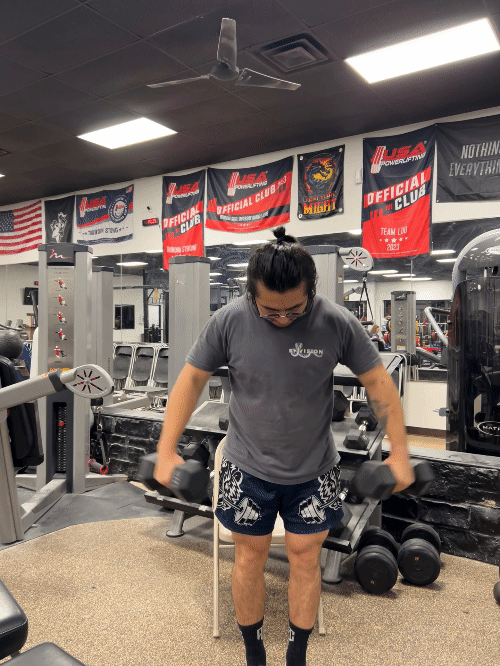
- Starting Position: Begin with palms facing toward yourself, holding the dumbbells by your side.
- Raising the Dumbbells: As you exhale, tighten your core and lift the dumbbells outward to the sides. Keep a slight bend in your elbows.
- Lowering the Dumbbells: Inhale as you gradually lower the dumbbells back to the starting position in front/next to your thighs, controlling the movement throughout.
- Depth of Movement: To maintain proper form, raise your arms slightly above shoulder level at most, then return to the starting position in a controlled manner, avoiding any swinging motion.
- Elbow Position at the Top: Keep your arms predominantly straight with a slight bend in the elbows. This slight bend helps prevent hyperextension or locking of the elbows, ensuring a safe and effective exercise.
Dumbbell Rear Delt Flies (Chest Supported)
The chest support is not mandatory for rear delt flys, but using a bench provides support. This support helps by taking the load off other parts of your body, allowing you to focus and add more load to your delts. For proper technique, ensure you use minimal elbow and lat assistance, as this will shift focus away from your delts. This exercise targets your posterior deltoids, and you will notice slight activation in your traps.
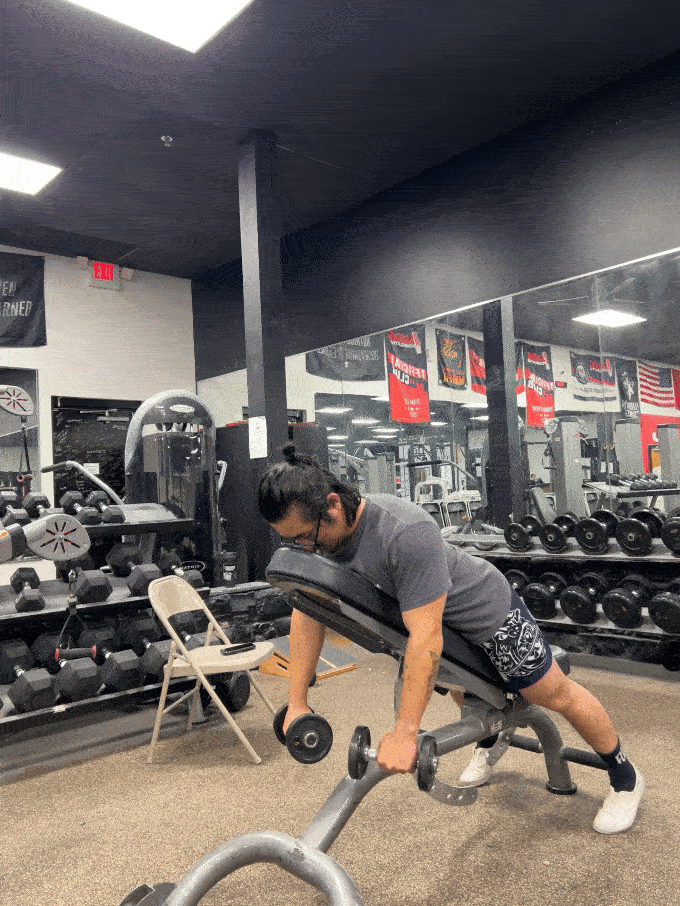
- Starting Position: Lay your chest on the bench while holding the dumbbells with your palms facing towards you or each other.
- Raising the Dumbbells: As you exhale, tighten your core and lift the dumbbells. Keep a slight bend in your elbows and raise your arms up and outwards to shoulder height.
- Lowering the Dumbbells: Inhale as you gradually lower the dumbbells back to the starting position.
- Depth of Movement: To maintain proper form, raise your arms slightly above shoulder level at most, then return to the starting position in a controlled manner, avoiding any swinging motion.
- Elbow Position at the Top: Keep your arms predominantly straight with a slight bend in the elbows. This slight bend helps prevent hyperextension or locking of the elbows, ensuring a safe and effective exercise.
Lying Dumbbell Tricep Extension
The lying tricep extension primarily targets the triceps, specifically the long head, although the medial and lateral heads are also greatly engaged
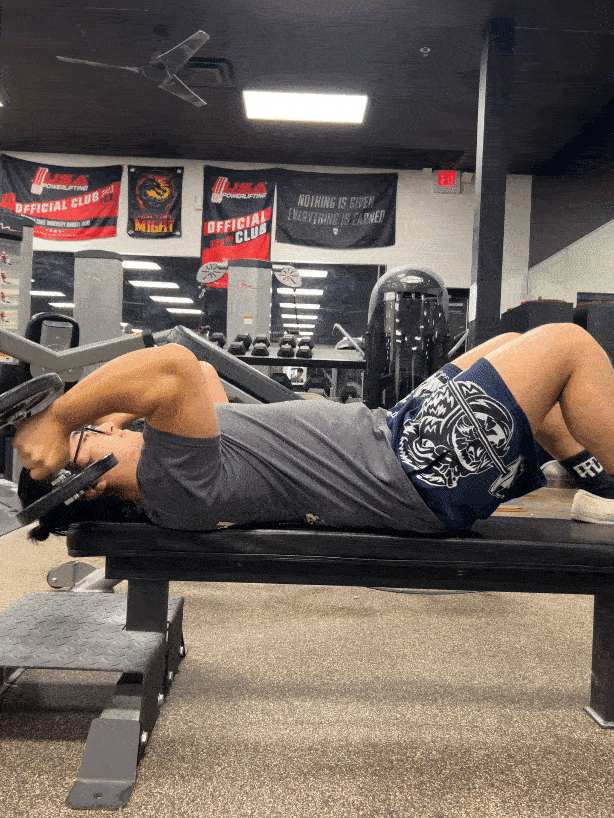
- Starting Position: Lie on the bench with the dumbbells positioned above your head. Keep your arms extended, with your elbows fully extended.
- Raising the Dumbbells: Exhale and extend your elbows over your head, but avoid snapping the weights into place.
- Lowering the Dumbbells: Inhale and bend your elbows back until the weights are next to your head. Keep your elbows locked in place throughout this movement.
- Depth of Movement: Exhale and bend your elbows back until the weights are next to your head. Keep your elbows locked in place throughout this movement.
- Elbow Position at the Top: Avoid hyperextending your elbows by swinging the weight back into position. Maintain a controlled motion throughout the exercise.
Close Grip Bench
The close grip bench primarily targets the triceps. Specifically, the lateral and medial head but the long head is also engaged. This technique is much easier to grasp due to similarities in the bench press.
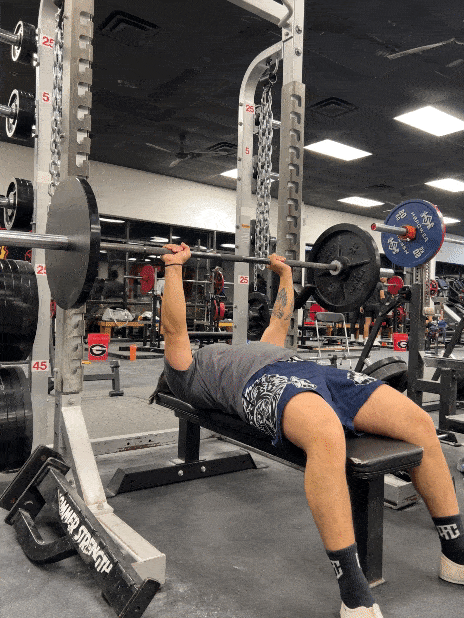
- Starting Position: Lie on the bench and grab the barbell with a shoulder-width grip.
- Raising the Dumbbells: Exhale and push the weight up, similar to a traditional bench press.
- Lowering the Dumbbells: Inhale and bring the weight down to your chest, keeping your elbows tucked in slightly more than in a normal bench press.
- Depth of Movement: Lower the barbell to chest level with elbows closer to ribs and push back up without locking your elbows.
- Elbow Position at the Top: Your arms should be fully extended but not hyperextended.